Edit (2019-05-07): I turned the cache off completly (Set the cache mode to None) because I once had an issue with an power outage which resulted in a non functioning windows VM.
In this note I describe how I setup Windows 10 on a Kernel-based virtual machine (KVM) using QEMU. In this approach I use the Virtual Machine Manager (GUI), but everything can be done via terminal terminal, too.
Here is a YouTube video in which I show all the steps below: https://youtu.be/RLy1zozJ9W0.
Step 1: Installation
First of all KVM, QEMU, the VM Manager and some dependencies for networking etc. need to be installed like follows:
sudo apt-get install qemu-kvm libvirt-bin bridge-utils virt-manager qemu virt-viewer spice-vdagentYou should enable virtualization (e.g. VT-x / AMD-V) in your BIOS / UEFI settings before you continue (thanks @Valentas for the tip to include this in the note).
Step 2: Initial setup
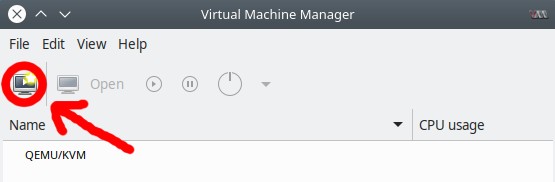
To create a new virtual machine start “Virtual Machine Manager”, which opens up a simple GUI. Click on the upper left button to open the New VM window.
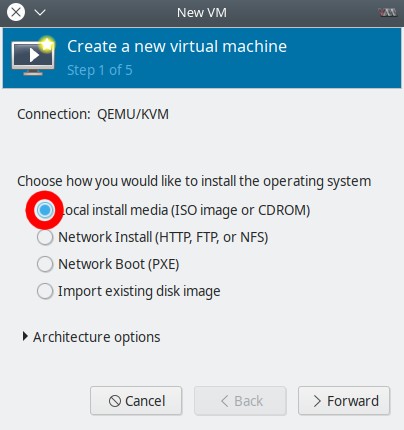
The first thing you have to do is to select how you would like to install the operating system. In this case we use a Windows 10 ISO image. Select the option Local install media and choose the Windows 10 ISO.
In the next step you need to select how much RAM and how many CPU cores the VM should have. It shows the hosts ressources as little gray text under the input fields.

Step 3: Storage
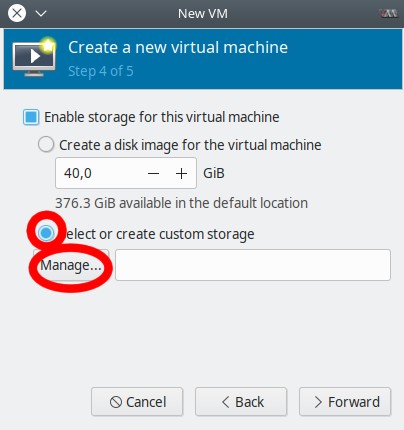
The next step is to select the storage of the virtual machine, which also means where the VM’s image should be stored. We are going to create a custom storage by clicking on Manage.
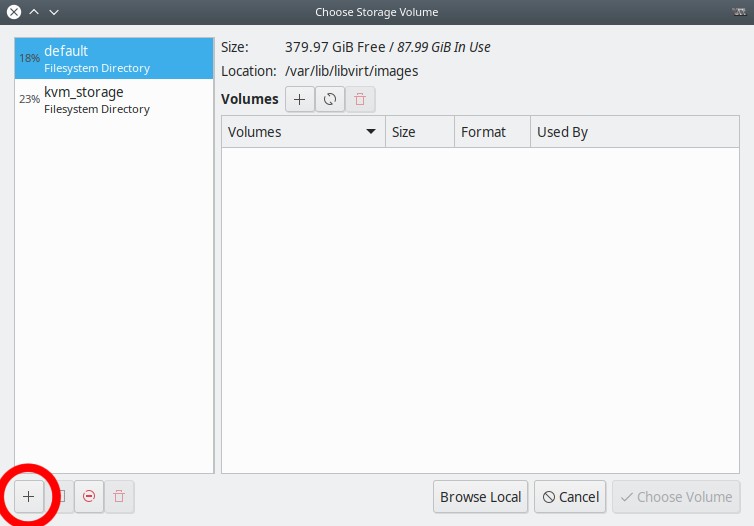
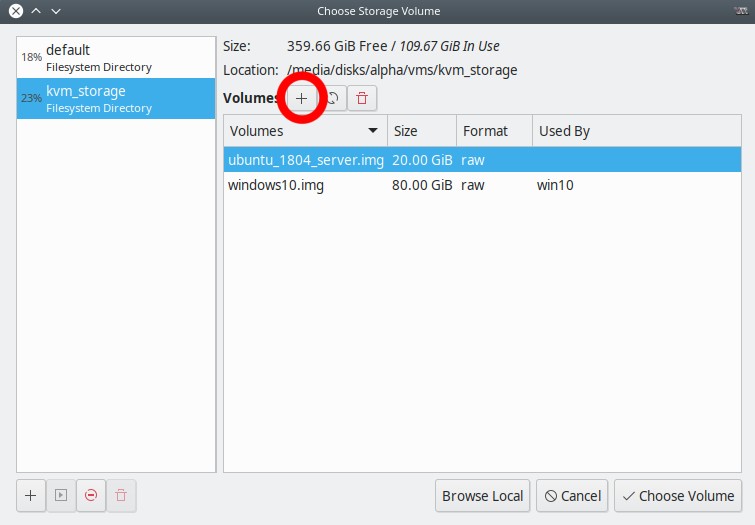
A new window Choose Storage Volume will pop up. The window mainly consists of two parts - Storage pools on the left and the storage volumes on the left side. The first thing to do here is to create a new storage pool. To do so, click on the plus button on the bottom left.
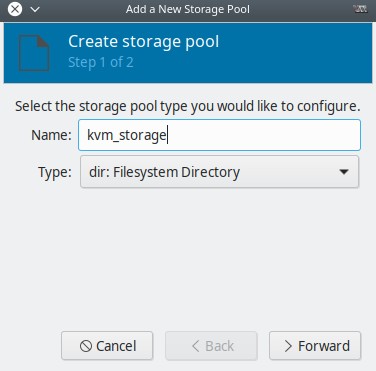
Here you can select all kinds of storage pool types. The simples one is is the Filesystem Directory, which I’ll use. You need to give it a name - in my case kvm_storage.
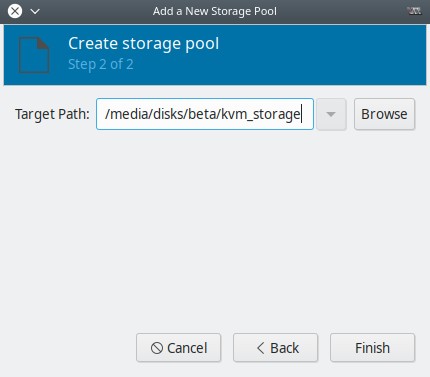
Now just select the path to the directory.
After the storage pool is created, select it on the left side of the window and klick on the plus button above the right table to create a new storage volume.
You should check the minimum requirements for the operating system you are going to install. For best performance choose the raw format. The qcow2 format offers some advanced features such as copy on write and live snapshots (Source: proxmox). I don’t need this features for my use case, so I choose performance over features. In addition you need to decide the capacity as well as how much of this capacity should be already allocated at the hosts system. At the end give the storage a name, this name will be used as a filename. So in my case I would have a win10.img in my kvm_storage.

Step 4: Finish the initial setup
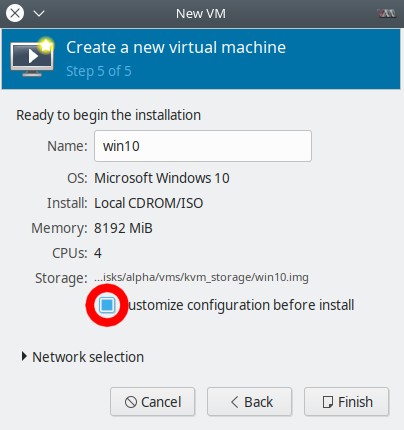
After you’ve finished your storage volume you can give name to the new virtual machine. Select Customize configuration before install, because we need to tweak a few other things, before we start the installation process.
Step 5 (optional): Open configuration
If you selected the Customize configuration before install option in the last step, the customization window should have opened automatically. If, for whatever reason, this isn’t the case, you can open the customization windows by double clicking the vms name in the Virtual Machine Manager and click on the info button - 2nd top left icon.
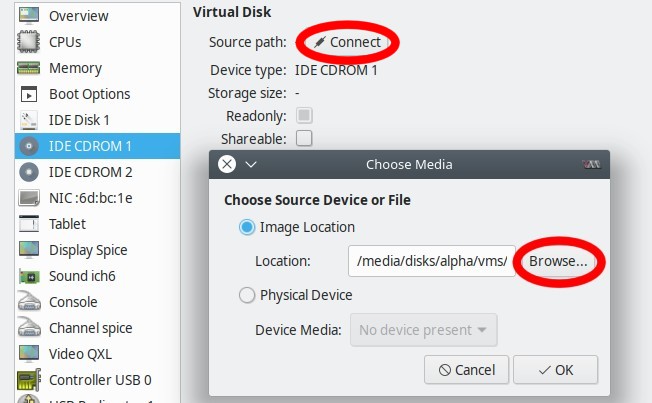
Step 6: Make sure the windows img is mounted
Sometimes the Windows img you’ve selected in the initial setup isn’t correctly connected. Make sure, that it is connected in IDECDROM 1. If not, connect it by clicking connect and set the image location to the according windows 10 .img file.
Step 7: Mount the VirtIO Drivers ISO
We’ll use the VirtIO storage and network windows drivers later. We need them while installing windows, thus we need to mount them via a ISO file. First of all get the VirtIO drivers ISO direct_link_stable Fedora Documentation, other versions. After downloading the ISO click on Add Hardware -> Storage -> Select or create custom storage -> Manage.
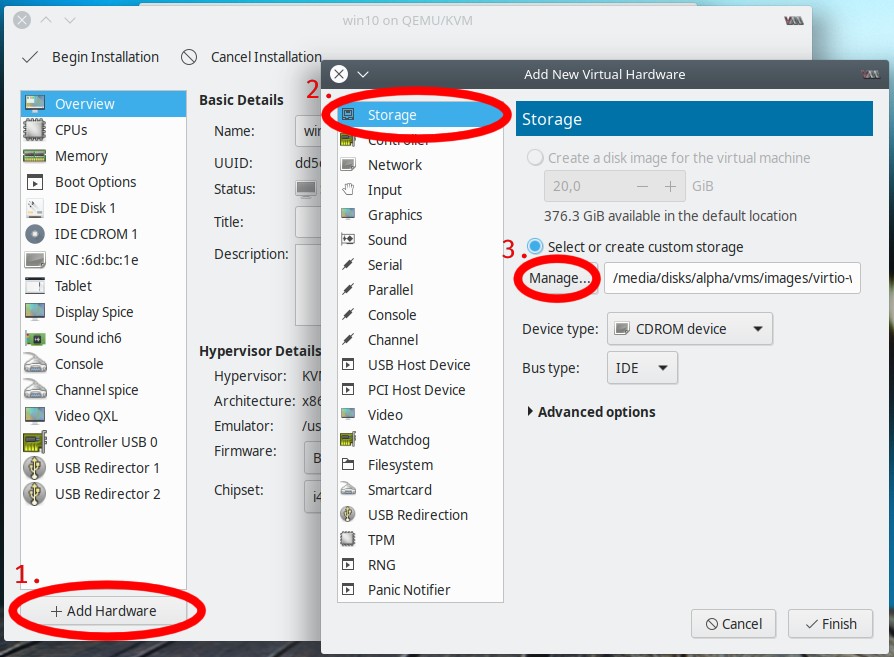
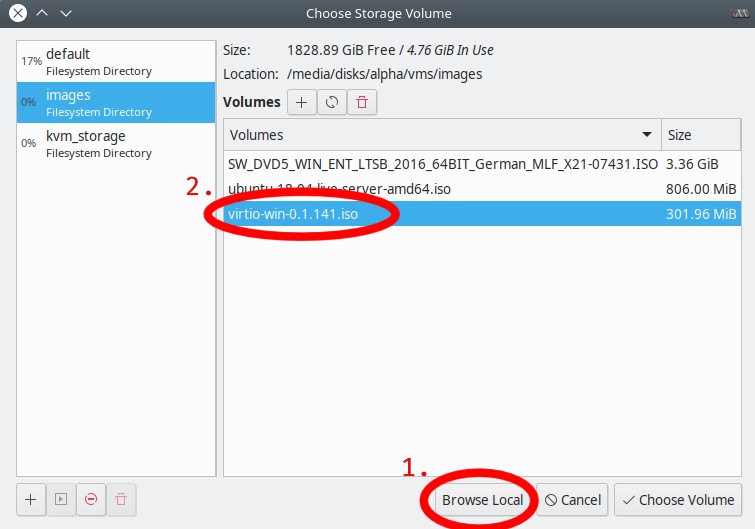
This will open the Choose Storage Volume dialog. Add the VirtIO iso via Browse Local and afterwards choose the volume. This will add a new virtual CDROM drive with the mounted VirtIO Drivers ISO.
Last, select the Device type: CDROM device.
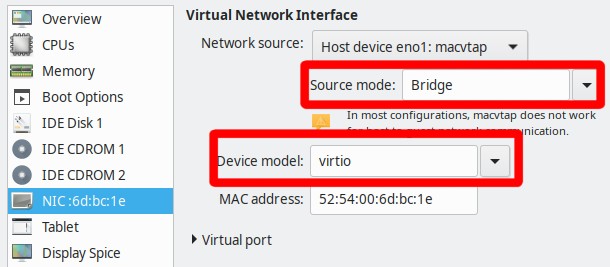
Step 8: Set the NIC
For best performance I set the network interface controller (NIC) to VirtIO by selecting the corresponding entry for the Device model. Optionally you can change the source mode by selecting a given host device. I usually use the bridged mode, which enables me to assign a own IP address to the VM and make it accessible via the network.
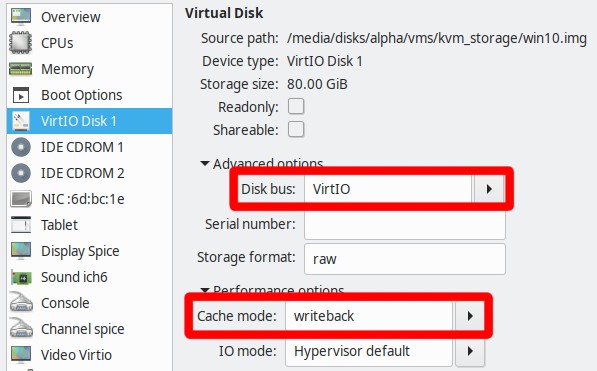
Step 9: Set the disk bus and cache mode
To get the best performance on the VM the storage disks bus must be set to VirtIO. This can be done by selecting VirtIO under IDE Disk 1 -> Advanced options -> Disk bus. Additionally the Cache mode should be set to writeback for best performance None for best stability. With this cache mode you may loose data on power outage. More about cache modes is nicely described at proxmox.
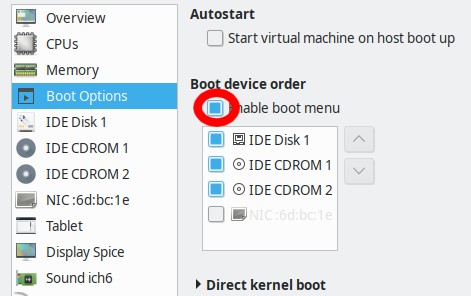
Step 10 (optional): Enable the boot menu
I usually enable the boot menu in my VMs, if i need to select a specific boot device or so.
Step 11: Windows installation
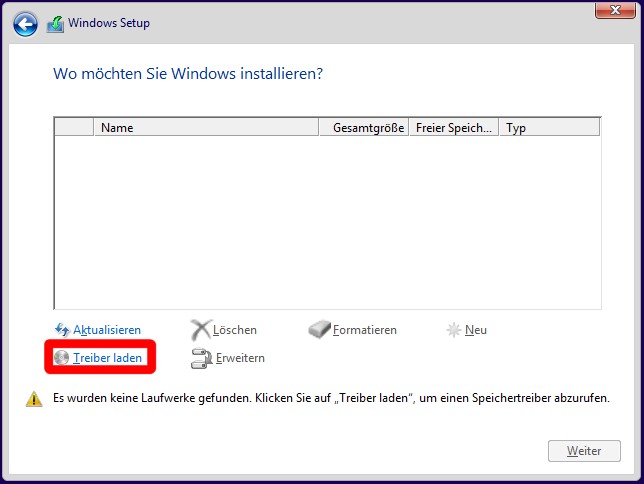
After you’ve finished the customization steps above click Begin Installation in the top left corner of the customization window. This will launch the VM and should automatically boot the Windows installer. The following images are from a german windows installer, but I think the following steps are understandable in every language. When you come to the point where you need to select where you want to install windows you’ll notice, that no volumes are found. This is because the storage driver is missing. To load the storage and the NIC drivers click on Load driver (bottom left of the second row).
In the next window you need to select the drivers location. Open the VirtIO CDROM Drive.
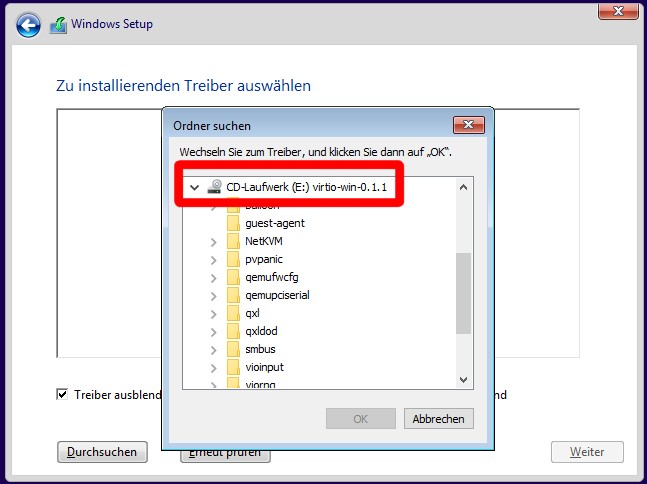
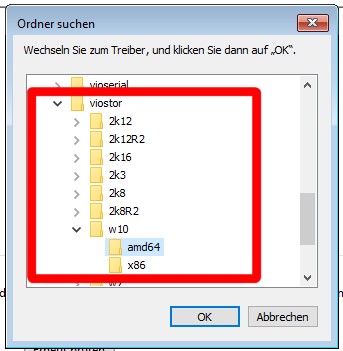
First of all select the storage driver. It is located in VirtIO drive/viostor/w10/amd64.
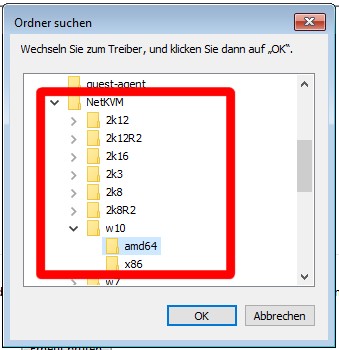
Click ok and load the driver. Now you should see the volume you’ve created and be able to install windows on it. Before installing click again on Load driver and load the VirtIO network driver. It is located unter VirtIO drive/NetKVM/w10/amd64.
Now you can just install windows as usual.
Step 11: Install VirtIO guest tools
After you’ve installed windows you should install spice guest tools. On the SPICE website It is described as follows:
This installer contains some optional drivers and services that can be installed in Windows guest to improve SPICE performance and integration. This includes the qxl video driver and the SPICE guest agent (for copy and paste, automatic resolution switching, …)
The most important parts here are the video driver as well as the SPICE guest agent which enables e.g. to copy and paste between host and guest.